A Beginner's Guide to Dyeing Wool
FTC Disclosure: Please note that some of the links in this post are affiliate or referral links (full disclosure here), and if you make a purchase or sign up for a service within a certain timeframe after clicking on one of those links, I may earn a small commission paid by the retailer at no extra cost to you. I wouldn't recommend anything that I don’t or wouldn't use myself. Thank you for your support!
This post was last edited/updated in March 2021.
Edited and cleaned up a bunch of the text, and refined how the immersion dyeing shopping list looks after updating the one on the slow cooker! Double checked links to see at least one of the products is no longer available, so updated that, and added links to safety equipment as well - because the dye powders are damaging to breathe in, and the respirator could come in handy with other home projects as well so why not.
At some point, especially once felting becomes a bit more than just a side hobby, you'll likely start considering how to acquire your materials at a cheaper cost, or when you want to have colors that are difficult to find. Note: this is a simple beginner's guide to acid dyeing. Getting started with dyeing is really easy and fun to do. There are more complicated techniques, and then things like plant dyes (which are “natural,” but “natural” doesn’t equate to being any safer or less toxic - poisonous plants exist, and you still use toxic chemicals for mordanting some colors). I would consider myself pretty good at dyeing - I have spent quite a few years practicing with it, but I still wouldn’t consider myself an expert on it. If you love dyeing your own wool, I highly recommend getting some books on the topic.
After all, $30 for a lb of wool is not exactly cheap, and that's the cheapest I've found for dyed wool. That's for the coarse stuff - merino is far more than that (though it's also more undyed/unprocessed). Especially when you can get undyed wool for $12-16 per pound (sometimes even less if you buy it in bulk). Ebay is a good place for buying wool. So are the fiber sale groups on Facebook. Update 2021: I have made a note in my to-blog list to make a separate post on all the different places I buy wool. So that will happen.
Yes, it is a little bit more work, but it's not so much work that it isn't worth it. In fact, if you try using a slow cooker which I talk about here, it’s practically effortless! You can get all the supplies you need for about $100 new or less if you already have some of the things on hand or find them in a thrift store (like the stock pot), and after that it's just a matter of spending a few bucks here and there to build up your dye collection and buying your wool.
What you will need:
I reorganized this list and updated some links, and set it up as a sort of “checklist” to make it easier for you to print out this page and take it with you to source the items you need, or to purchase what you’re missing. You likely don’t need to buy some of the things mentioned here - you may already have some you’re willing to sacrifice for your dyeing practice - and some that you do need to buy, you can likely source at your local thrift store. Since I can’t download the images and use them here for copyright reasons, this is the next best thing to help provide a visual. They should all be able to fit in a big plastic bin for storage, or right inside your pot. I moved the slow-cooker things to the slow-cooker dyeing page, this is just for stovetop dyeing.
I’ve included three parameters: Mandatory, Recommended, and Optional. Mandatory means you can’t dye without this. Recommended means if you want accuracy with results you can log and have more success in repeating those results, get these things (dyeing is both an art and a science - if you take the science out, you won’t know what went right or wrong). Optional is exactly that - you might like to consider something like this, but you can get good results without it.
“Do NOT reuse any equipment that touches dye for food.”
To make shopping easier for you, here's an idea list where I've compiled the stuff the list below, plus a few extra alternatives. There are notes on each of the items (I do try to be funny on some), but I'm limited to fewer characters than a tweet. Refer back to the post for any questions.
Mandatory:
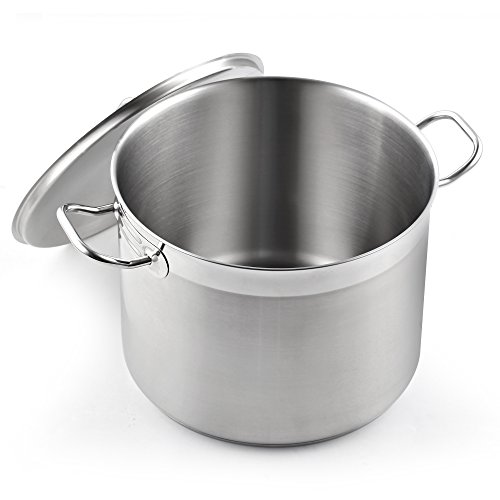
HUGE stock pot - Not one you use for food prep. Stainless steel is best, 20 quart minimum. You can get enamel pots too, just note that they are not recommended for glass-top ranges. Check out restaurant supply warehouses - you'll likely find them there cheaper. STAY AWAY FROM ALUMINUM POTS - they will pit from the acid over time.
Optional:
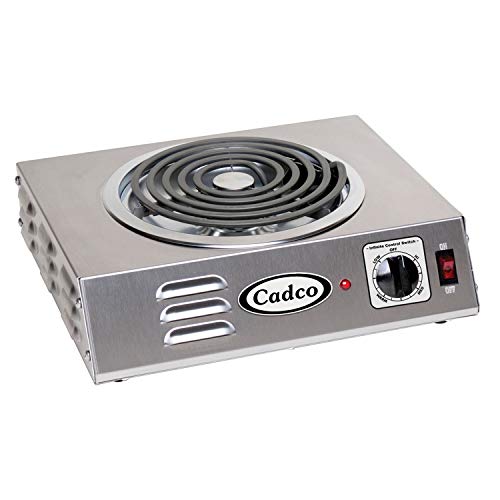
Hot Plate - (optional) If you have an induction stove or ceramic glass stove, you may be hesitant to use a big heavy pot on top of it. This one is used by canners (which you also shouldn't do on a glass stove), so you know it can handle it. This also makes dyeing portable so you don't need to do it where you do your food prep if you don't want to.
Recommended:
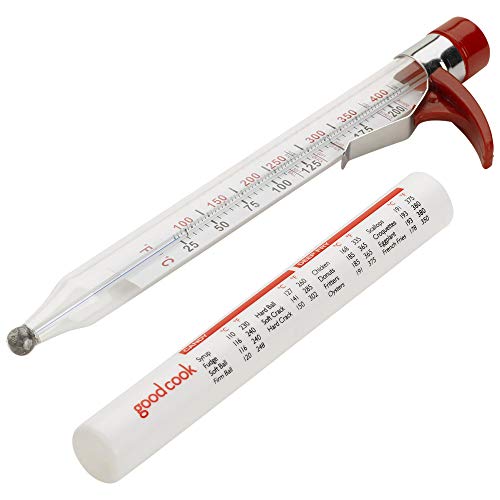
Thermometer - I personally find this necessary for stovetop immersion dyeing to let you know whether or not you're approaching the boiling point, or if your water is hot enough for certain dyes to set. Some need to be just under boiling to work well and not wash out. It clips onto the side of the pot and takes the guesswork out of it.
Recommended:
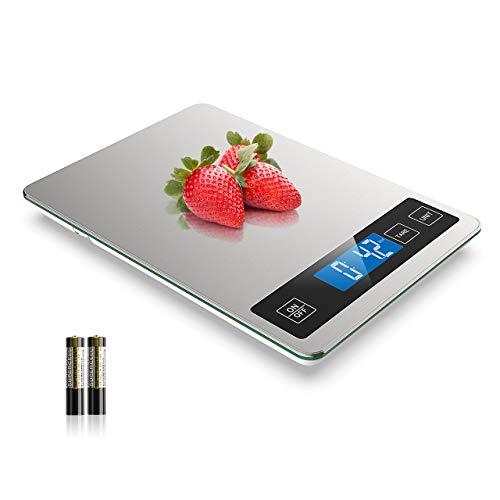
Kitchen scale - Necessary to weigh out how much wool you're using, so you know how much dye to use. Some people like to just guess and scoop a bunch of dye into the pot to see what happens. You can do that, but chances are you will never get the same color again - close, but not exact. Especially if you're mixing several dyes. It's a science.
Recommended:

Milligram scale - This is the company's replacement for the one I use and love. Please check my idea list above, where I provide two alternatives due to the imperfect ratings on this one and make a decision based off those. If you measure your dyes and log them in your dye log, the next time you want to get a similar color, you'll know how to repeat the process.
Recommended:

Stainless Steel Scoops - the company that sells the milligram scale replaced the included scoops with tweezers - this set has more than enough to help you scoop the powdered dye onto the little bowl of the scale. It's more prescise and less wasteful than using a plastic spoon.
Mandatory:

Tongs - These are to move your wool to and from the dye pot and to help poke your wool a bit in the dye pot to make sure the dye moves freely through the wool. Any tongs will do, but don't reuse them for food.
Mandatory:
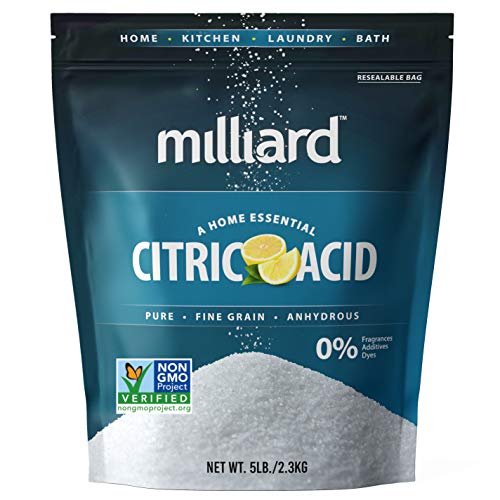
Citric Acid - It's not acid dyeing without the acid. You can use vinegar, but you'll need to know how much to add to the pot, and when you use vinegar you can smell it while it's dyeing.
Mandatory:
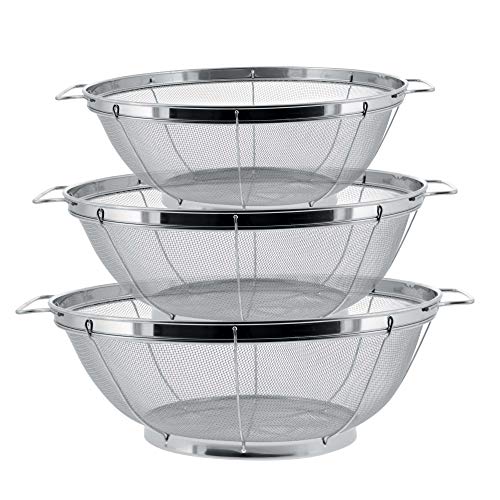
Strainer - You do need a strainer of some sort, but you might have one you're willing to spare. This keeps your wool from clogging up your drain, and it allows the wool to drain after dyeing and then washing/rinsing it afterwards.
Mandatory:
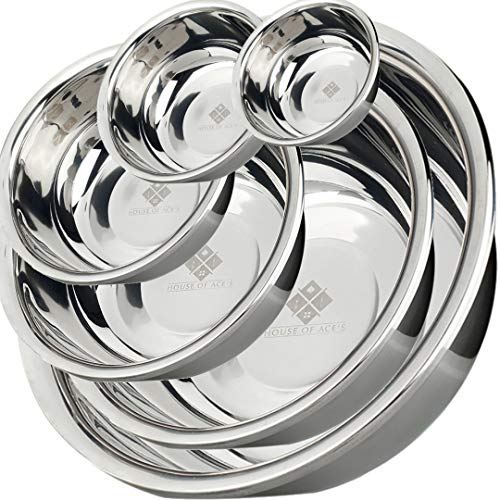
Bowls that can withstand heat - This is to soak your wool before dyeing and then rinse it out after dyeing. You'll stand your strainer in the bowl, and move your hot wool into the strainer from the pot. Again, you may already have extras at home.
Optional:

Water Kettle - I dissolve my dye using boiling water, and my electric kettle makes quick work of that. Some dyes pretty much require it - especially if you want a more even color throughout. If you have another way of boiling water (or have an instant hot water tap), then having a dedicated water kettle isn't necessary. If you like more variation in color you can sprinkle dye into the pot too.
Recommended:

Neutral PH wool-safe detergent- Dharma sells Synthrapol. I use Unicorn Clean. Yes, it’s pricier than your standard detergent, but you only need a drop in your wool wash. I recommend the Power Scour if you plan on processing your own wool (I get that one in the gallon jug, it’ll last me a while). You don’t need both. For rinsing, however, Woolite is also an acceptable alternative. It's good to have a neutral-PH detergent for washing wool in general.
Recommended:
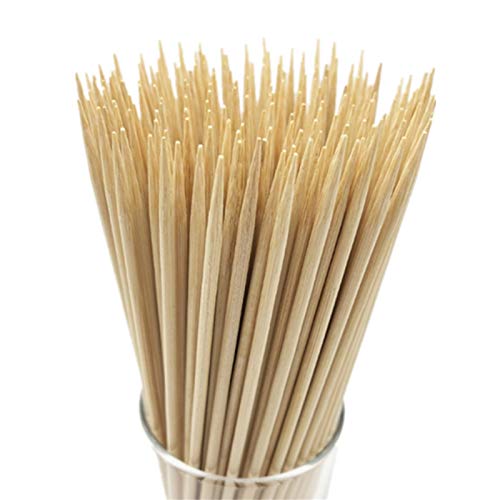
Bamboo Skewers - Very versatile, useful to help stir the dye as it dissolves and poke at the wool in the slow cooker. I've been using the same one for years. If these look familiar, I also recommend them in my 3D needle felting guide. I told you they’re handy for other things!
Mandatory:

Acid Dyes - I am personally a huge fan of both Dharma Trading Co. and Jacquard. I think Dharma’s acid dyes are a bit cheaper. Also, they have more colors. You can get either at DharmaTrading. If you have some of both, yes, you can mix them. If you’re just getting everything to start on Amazon, there is a set of four colors from Jacquard - not sure if they’re the correct mix of “primaries” (if you read my first post on dyeing, there are cools and warms) - but you’ll still be able to have some fun playing around!
Safety Equipment: Highly Recommended
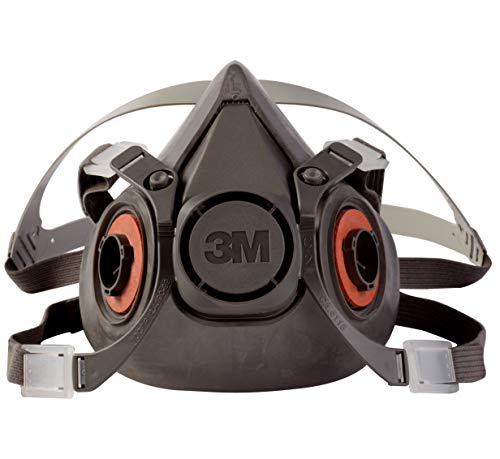
Respirator - You really don’t want to breathe these dye powders. Dyed wool is safe but the powders are not. A standard mask at home should be fine, but this is probably better.

Filters - for the respirator on the left

Goggles - I personally haven’t had any issue with powder getting all over the place and in my eyes, but it’s better to be safe than sorry. There are no fumes involved in case that’s what you’re wondering.
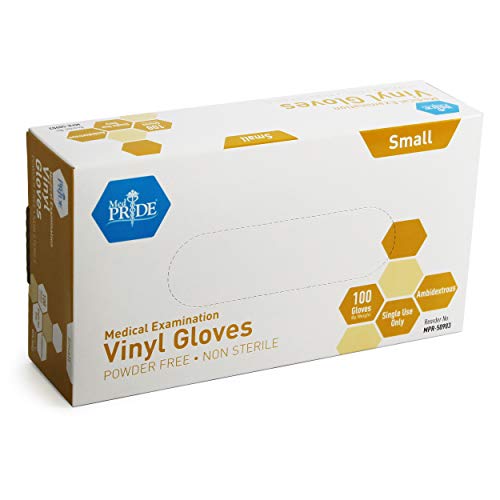
Gloves - I’m a huge fan of vinyl gloves - they seem to be a bit more durable than the latex kind.
Not available on Amazon (so no photo):
Ammonium Sulfate (optional) - this is if you choose to use any premetalized dyes. Many of Dharma's acid dyes are premetalized (which is how they're able to offer so many colors), and while you do not have to use this to dye your wool, you will want this if you want to aim for a mostly even color. Don't get scared off by the word "advanced" - it's just an extra step or two and if you don't use it, it just means you'll get a lot more color variation in the end product. It's a cool effect and we needle felters will find a use for anything.
Glass Jars - how I mix my dye. I’ve done this in mason jars, left over glass spice jars, glass juice bottles. You really don’t need to buy more glass just repurpose what you have (and remember, don’t reuse for food).
Measuring spoon - this is for the citric acid, which is food safe. You can reuse this in the kitchen when you’re done, but if you’re like me you probably already have several sets anyway (because that darn tablespoon always goes missing).
Which Dyes to get
My opinion, get them all! LOL
That being said, that would be a lot of money, and even I don't own all the dyes. So, I do this two ways. First, I buy the primaries in larger quantities (8oz-1lb). For specific colors I buy them in 2oz increments. My reason is that it's a LOT of fun to mix up colors, and it's not that hard to do. Want a reddish orange? Use a lot of red and a bit of yellow. Want a goldenrod color? Use a lot of yellow and a pinch of red. However, some colors are a little more difficult to obtain through mixing, like browns or hot pink or a bright purple.
These are the primaries for Jacquard acid dyes:
Warm primaries: 617 Cherry, 624 Turquoise, 601 Sun Yellow
Cool primaries: 618 Fire Red, 623 Brilliant Blue and 601 Sun Yellow
Dharma's primaries:
Warm primaries: 402 Fire Engine Red, 404 Sapphire Blue or 409 Dark Navy, 401 Brilliant Yellow
Cool primaries: 411 Deep Magenta, 407 Caribbean Blue, 401 Brilliant Yellow
Luckily Dharma lists (primary) next to the dye names on their site. There are more primaries than the ones here - that just means those colors are not easily obtained by mixing the primaries. Like hot pink or black. Those I'd only get in 2oz increments. Although Jacquard lists two primary yellows, at the time I researched this, 601 worked for both warm and cool colors (if it's a pure enough color, like a pure magenta or pure cyan, it works for both). You do want to pay attention to warm vs cool, because it does make a difference. They'll be good for mixing some hues but not others. That being said, there is no "wrong" in mixing dyes - this is why it's important to experiment and document to figure out how to get the colors you want for your projects.
For the other dyes, grab what you need when you need it. Dharma's shipping is incredibly fast.
Mixing Dyes
If you know basic color theory, that's pretty much all you need to know to mix your colors. 50% red and 50% yellow will get you orange. 50% yellow and 50% blue will get you green. Play around with the percentages to get different hues.
However, you can get even more specific if you have a very specific color in mind and want to know how to obtain that with precision dyeing. You can find the color you want using this CMYK picker (C=cyan, M=magenta, Y=yellow, K=black) or use Margaret’s RGB to CMYK converter. Then, you can use the CMYK value of the color to figure out how much of each dye to use. This PDF explains the math behind it (Note: it is NOT my work or my PDF, but this was on the old site and is not on the new one, and I still have it saved for personal use. Unless Margaret reaches out to me and asks me to take it down, I’ll leave it up, assuming the original intention was to help teach how to dye - of course, you can just go on the wayback machine and find it here…), or use this super handy amazingly awesome calculator to do the math for you. I personally love the converter because it tells you how much dye to weigh out, not just the percentages in the total makeup. For the depth of shade, enter in how dark you want it to be. I typically use 2% for everything (if you look at the charts on Dharma's site for the colors, those are supposed to be at 2%). Since I'm not getting into dye stock solutions, I'm not worried about the stock solution percentage, water ratio, or any of that. I don't have the storage to set up a bunch of stock solutions - I just mix and go. For what we're doing here, just pay attention to the CMY or CMYK, the dry weight of your fiber (weigh your wool that you plan on dyeing), and your depth of shade. The other side will tell you how much dye you need to weigh out for your fiber. This is a good calculator even if you're not mixing colors because it'll still tell you how much dye you need. So if you're dyeing 2 oz of fiber at 2% OWG (% Of Weight of Goods), you'll need .04oz of dye. See, you don't have to do math, it does it for you.
I would also like to direct you to Dharma Trading Co.’s website, which has really clear instructions and some tutorials on dyeing and calculating all this stuff, including which of their dyes are primaries! You’re already going there to get the acid dye, so scroll down and click on “instructions” and “tutorials” tabs to learn more. This is mainly how I learned to start dyeing, and then the rest I learned through practice and experimentation. This is one of those things you have to do, and be willing to experiment with, than just read out of a book. You won’t understand dyeing until you try it yourself. I am not an affiliate of Dharma Trading Co., I just love to shop there.
Another note: Sometimes the CMYK thing won’t go as planned, because we’re dyeing, not printing. But, that being said, it’s a good way to learn how certain colors may blend and then you can tweak that to get the results you want. I suggest doing smaller samples, so not 1lb at a time, testing things out, and document EVERYTHING. Because even if you don’t get the color you wanted, you might get a color you really love, and then at least you’d be able to replicate those results!
Prepare to Dye
Anyone else think of Inigo Montoya from Princess Bride here? "Hello. My name is Inigo Montoya. You killed my father. Prepare to die." No? Just me?
So, you have all your stuff out ready to go. Now what?

Weigh out your dry wool - don’t forget to tare/zero your container first.
First, after weighing out your wool to figure out how much dye to use, get it soaking in a bowl of water. You can put dry wool directly in the pot, but it takes the dye up easier/more evenly if it's soaked first. Some people soak it with the acid, some people don't. I don't use acid in my soak, which I'll explain in a minute.
Fill your pot with water and get it heating up on the stove. It's a lot of water, it might take a while. Clip your thermometer on the pot so that the tip is in the water. Personally I like to start the heat on high, then as it approaches boiling (at about 200 degrees F) I knock it down to medium. You want a lot more water than your fiber. This is why I recommend bigger pots. If you stuff your pot, the water (and dye) will not be able to get to all of it, and you'll end up with fiber that isn't dyed or barely dyed. You want it to float freely.

You can also prepare your dye ahead of time. These are old spice jars.
This is when I measure out the dye I'm going to use in that batch. Once the water starts getting nice and hot, I use the jar to scoop out some of the water in the pot, add the dye to the jar, stir it with a skewer, and once dissolved I pour the whole thing back into the pot.
Add your wool to the pot.
Here's another one where people differ on how they do things. Some people add the acid at the start. You'll want a cup of vinegar or 1 tablespoon of citric acid for a pound of wool. I don't do less for less wool, but you shouldn't need more than that. The other school of thought is, if you want to have consistent color, to not add your acid until close to the end, when the dye has had a chance to absorb into the fiber. If you add it in the beginning, you will have color breaks. Some dyes take longer than others to set. Reds set a lot faster than blues. In my experience, turquoise seems to take forever to get absorbed. If you like color breaks, have fun with it. The best way to figure this stuff out is through experimentation. You don't need the acid to absorb the dye, you need it to make sure the dye stays put and doesn't wash out.
Leave your wool to dye in the pot for half an hour to an hour, very gently stirring it (I'll just poke it with my skewer or the tongs a few times to make sure the dye bath is flowing through it). You don't want your pot boiling. You don't want to agitate your wool. Basically you don't want to accidentally felt your wool. This is even more important when dyeing finer fibers such as alpaca or merino than coarser wools, which can handle a bit more prodding. It seems as if finer fibers can felt a bit if you just look at them wrong. I would suggest if you're just starting out, practice on coarser fibers. Once it's been in there a while and the color seems to be where you want it, add the acid. You'll know it's done when you can see in the pot, and the water is clearish. Some people can get it nearly water clear, but having a bit of a tint to it is okay too.
Optional: if there is still a bit of dye left in your pot but your wool is the color you want it (it's not that easy to tell when it's wet, it lightens up a bit when dry), soak a bit more wool and throw it in the pot. I always do this when I dye, because even those lightly tinted colors are great, especially if you're blending your fibers later for a more custom color. Like, let's say you're going to do a wool painting of a sky, and you got your sky blue, but you still got some blue tint in the pot. Throw some more wool in for a baby blue wool. You'll be able to use that for your clouds!
If you're done and not dyeing more wool, remove it from heat and let it reach room temperature before removing your wool. If you plan on dyeing more in the same bath, use a pair of tongs to gently remove your wool and put it in a bowl to transfer to a colander or strainer of some sort. Leave it in the sink to drain and cool off.
Once the wool is cooled off, grab a bowl and fill it with lukewarm water. Add the tiniest splash of wool-safe soap (I use unicorn clean). Gently swish it in there to rinse out any extra dye. Change out the water and rinse it. Sometimes the dyeing process can dry out your fiber, so you can add a fabric softener (don't use store ones for this, Dharma sells milsoft, Unicorn Clean has a fiber rinse) to restore the softness. Don't use too much, because it's essentially coating the fiber, so the tiniest amount of that goes a long way.

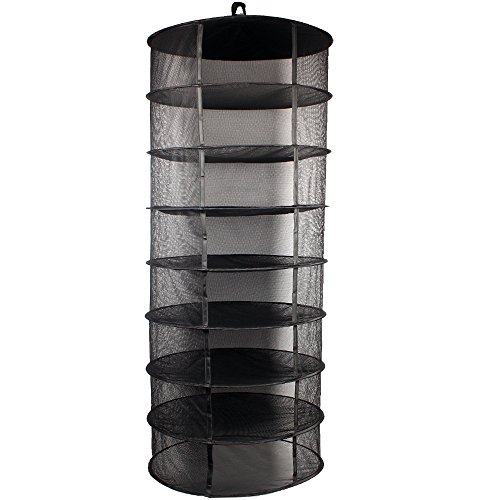
These herb drying racks are great for drying wool - I have one that I can hang up, but there are standing ones too. See below for options.
Set your wool out to dry. You can hang it outside, or hang it over your tub, or place it somewhere on a mesh screen. It will be a bit drippy though, so keep that in mind. I have a contraption in my laundry room for hanging things to dry, and part of it hangs over the utility sink, so that's where I hang my wool. Update: I later invested in an herb drying rack, and if you can’t hang it over a sink, you can place a towel in the bottom to catch any drips. Check out my top picks below (affiliate links). Periodically check on it as it's drying and gently pull the fibers apart to fluff it up and allow more air to circulate through it.
For small batches of wool, if you don’t have much space:

Something I didn’t consider when buying mine, but if you plan to hang yours outdoor and it gets windy, picking it up off the lawn isn’t fun. Zippers!


Once it's dry, it's ready to use! You can dye wool in any form as long as it's scoured first. You can felt with it as is. I like to run mine through the drum carder one time before it's put away, but I was dyeing wool before I had any carders. It's totally fine.